Deploy to Cloudflare Pages
This guide walks you through deploying your SvelteKit + Convex app to Cloudflare Pages. Choose between two configuration approaches based on your workflow preferences.
Option 1: Configuration via wrangler.toml
Configure Cloudflare from your repository. This approach keeps all settings in version control.
Best for: Teams that prefer infrastructure as code
Trade-off: Requires maintaining a config file
1. Create wrangler.toml
Create a wrangler.toml file in your repository root (next to package.json):
Replace the placeholders with your actual values:
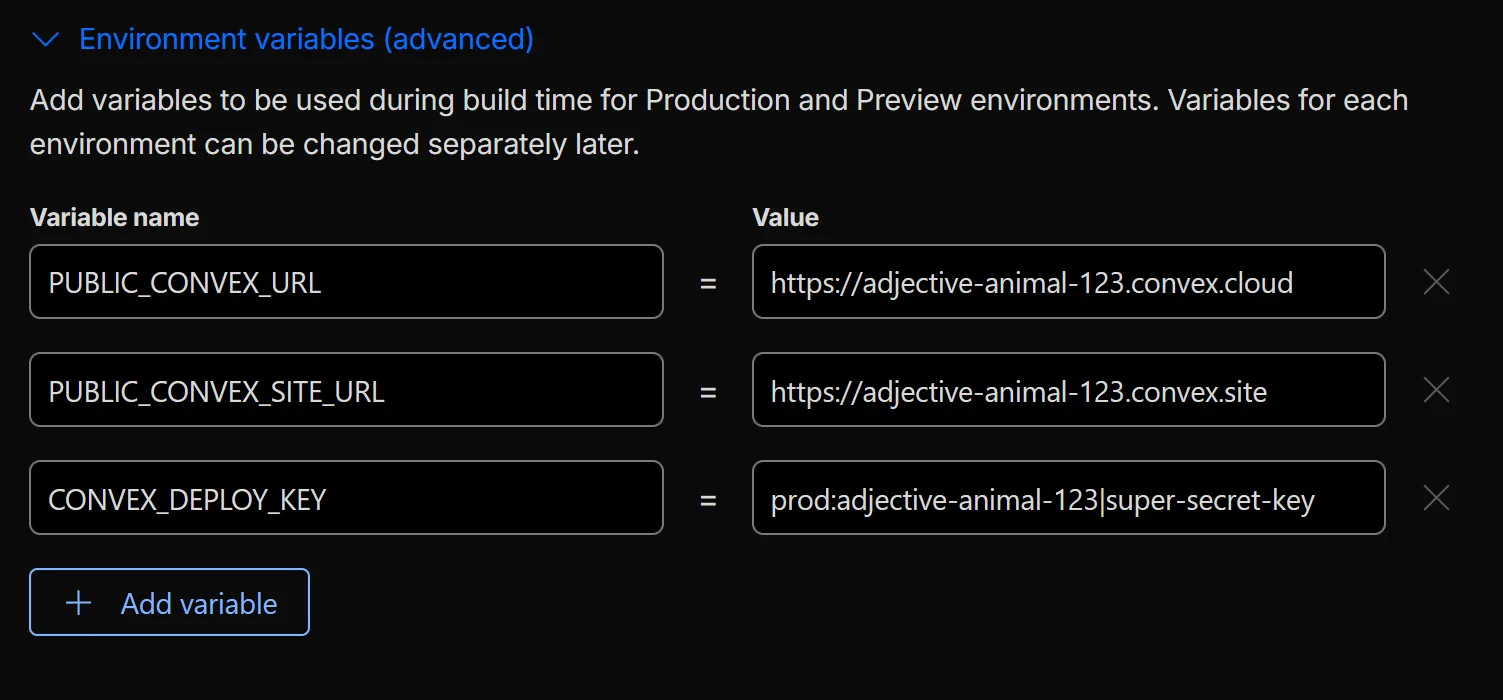
name: Your project namePUBLIC_CONVEX_URL: Your Convex deployment URLPUBLIC_CONVEX_SITE_URL: Your Convex site URL (same as above but with.site)CONVEX_DEPLOY_KEY: Your production deploy key from the Convex dashboard
Note
To configure different environment variables for preview and production deployments, see Cloudflare’s environment configuration guide.
2. Create a Cloudflare Pages project
Navigate to your Cloudflare dashboard: Compute & AI → Workers & Pages → Create application.
Select Pages → Import an existing Git repository.
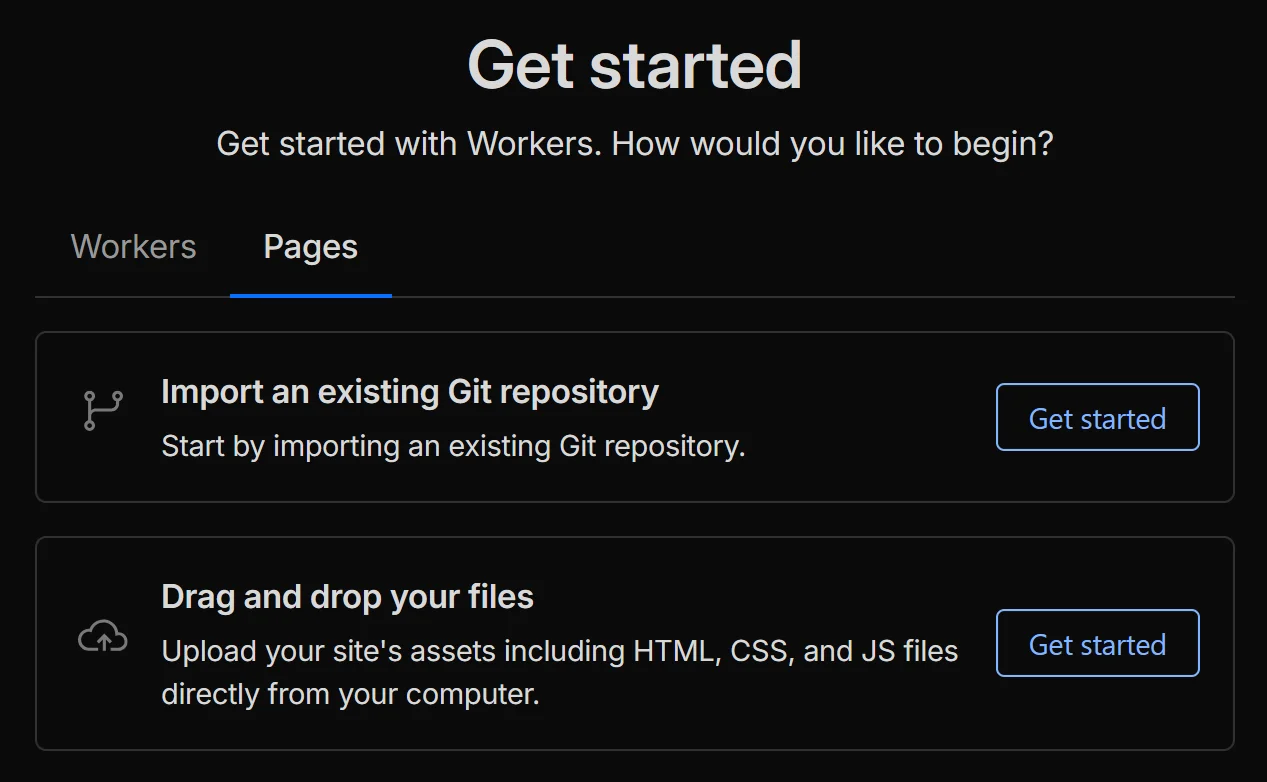
Choose your repository and begin setup.
3. Configure build settings
Set the following:
- Project name: Your desired project name
- Production branch: Your production branch (e.g.,
main) - Build command:
npx convex deploy --cmd='vite build' - Build output directory:
.svelte-kit/cloudflare
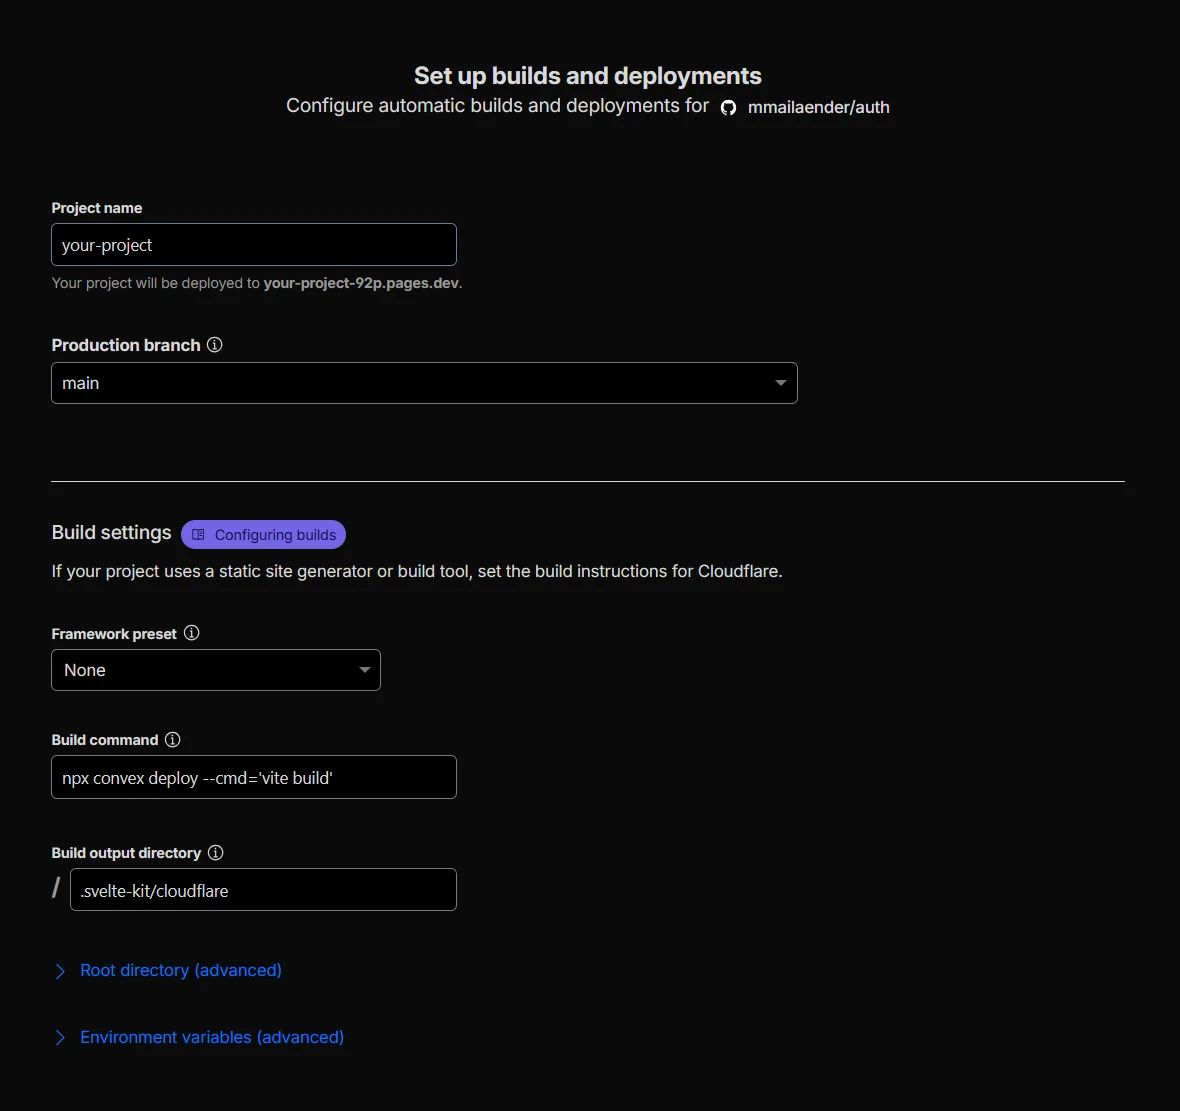
Click Save and Deploy.
Option 2: Configuration via Dashboard
Configure everything through the Cloudflare dashboard UI.
Best for: Quick setup and teams that prefer GUI configuration
Trade-off: Settings aren’t tracked in version control
1. Create a Cloudflare Pages project
Navigate to your Cloudflare dashboard: Compute & AI → Workers & Pages → Create application.
Select Pages → Import an existing Git repository.
Choose your repository and begin setup.
2. Configure build settings and environment variables
Set the following:
- Project name: Your desired project name
- Production branch: Your production branch (e.g.,
main) - Build command:
npx convex deploy --cmd='vite build' - Build output directory:
.svelte-kit/cloudflare
Add these environment variables (get the values from your Convex production dashboard under URL & Deploy Key):
Click Save and Deploy.
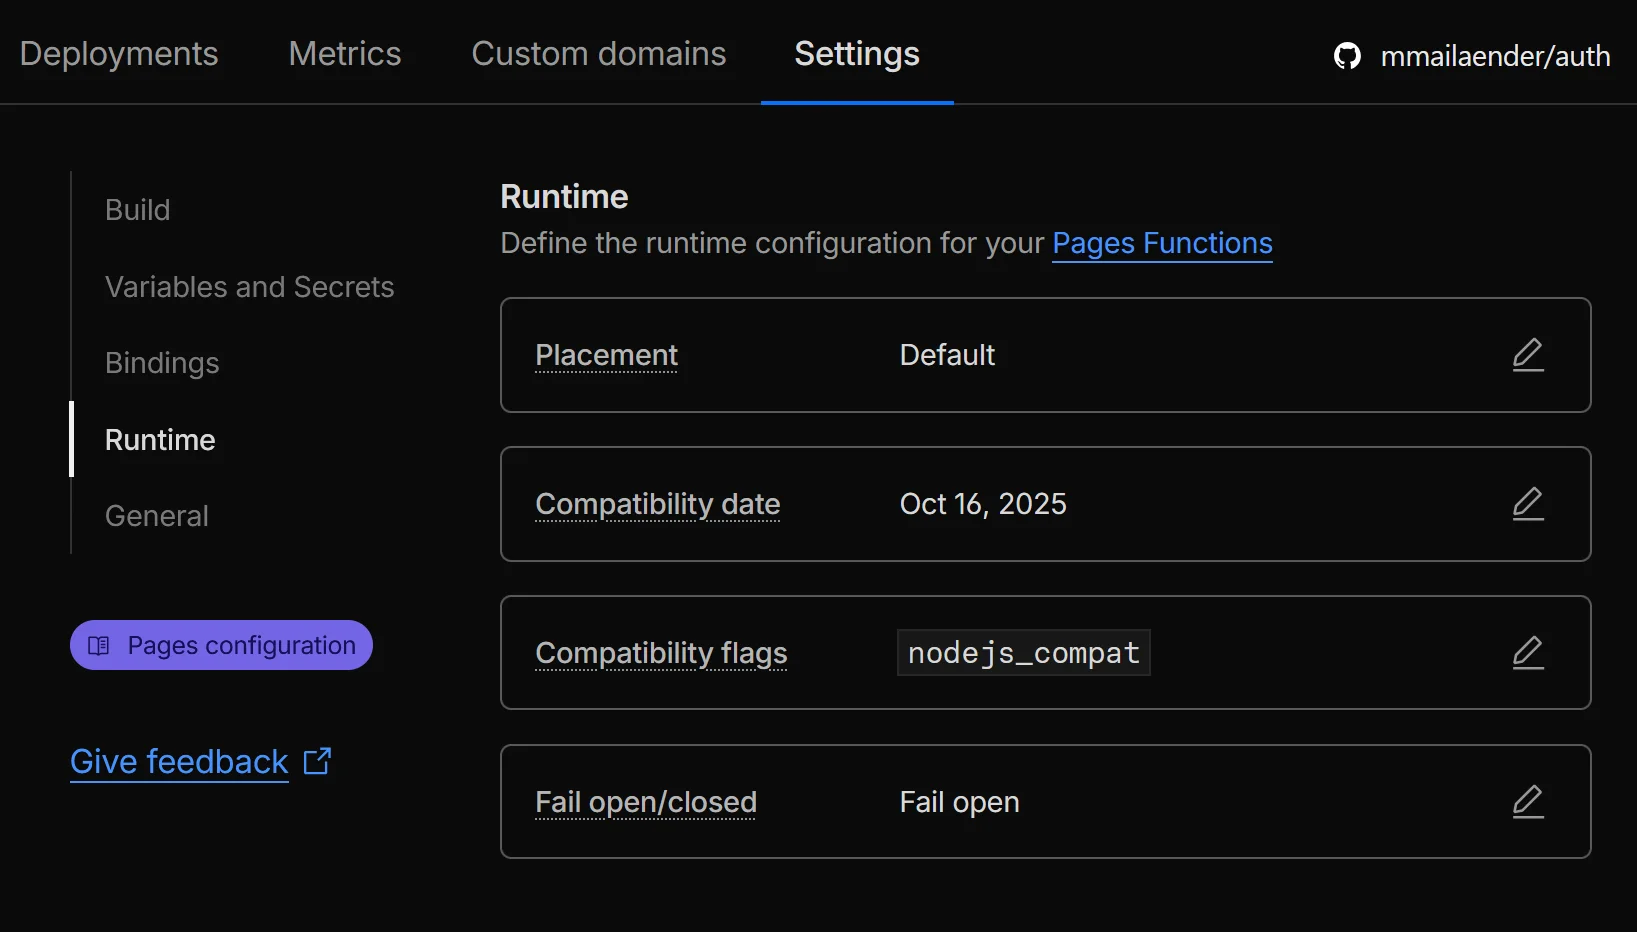
3. Add Node.js compatibility
The first deployment will fail with a warning about the node:async_hooks package. This is expected.
Click Continue to project, then navigate to Settings → Runtime.
Add nodejs_compat as a Compatibility flag and save.
Trigger a new deployment by pushing a commit or using the Retry deployment button.
Your app should now be live on Cloudflare Pages. Future deployments will happen automatically when you push to your configured branch.