Setup & Usage
Learn how to install and use Figma Library.
For best results, a Figma Professional Team Plan (or higher) is recommended.
How to Install the Figma Library
2. Create a New Project
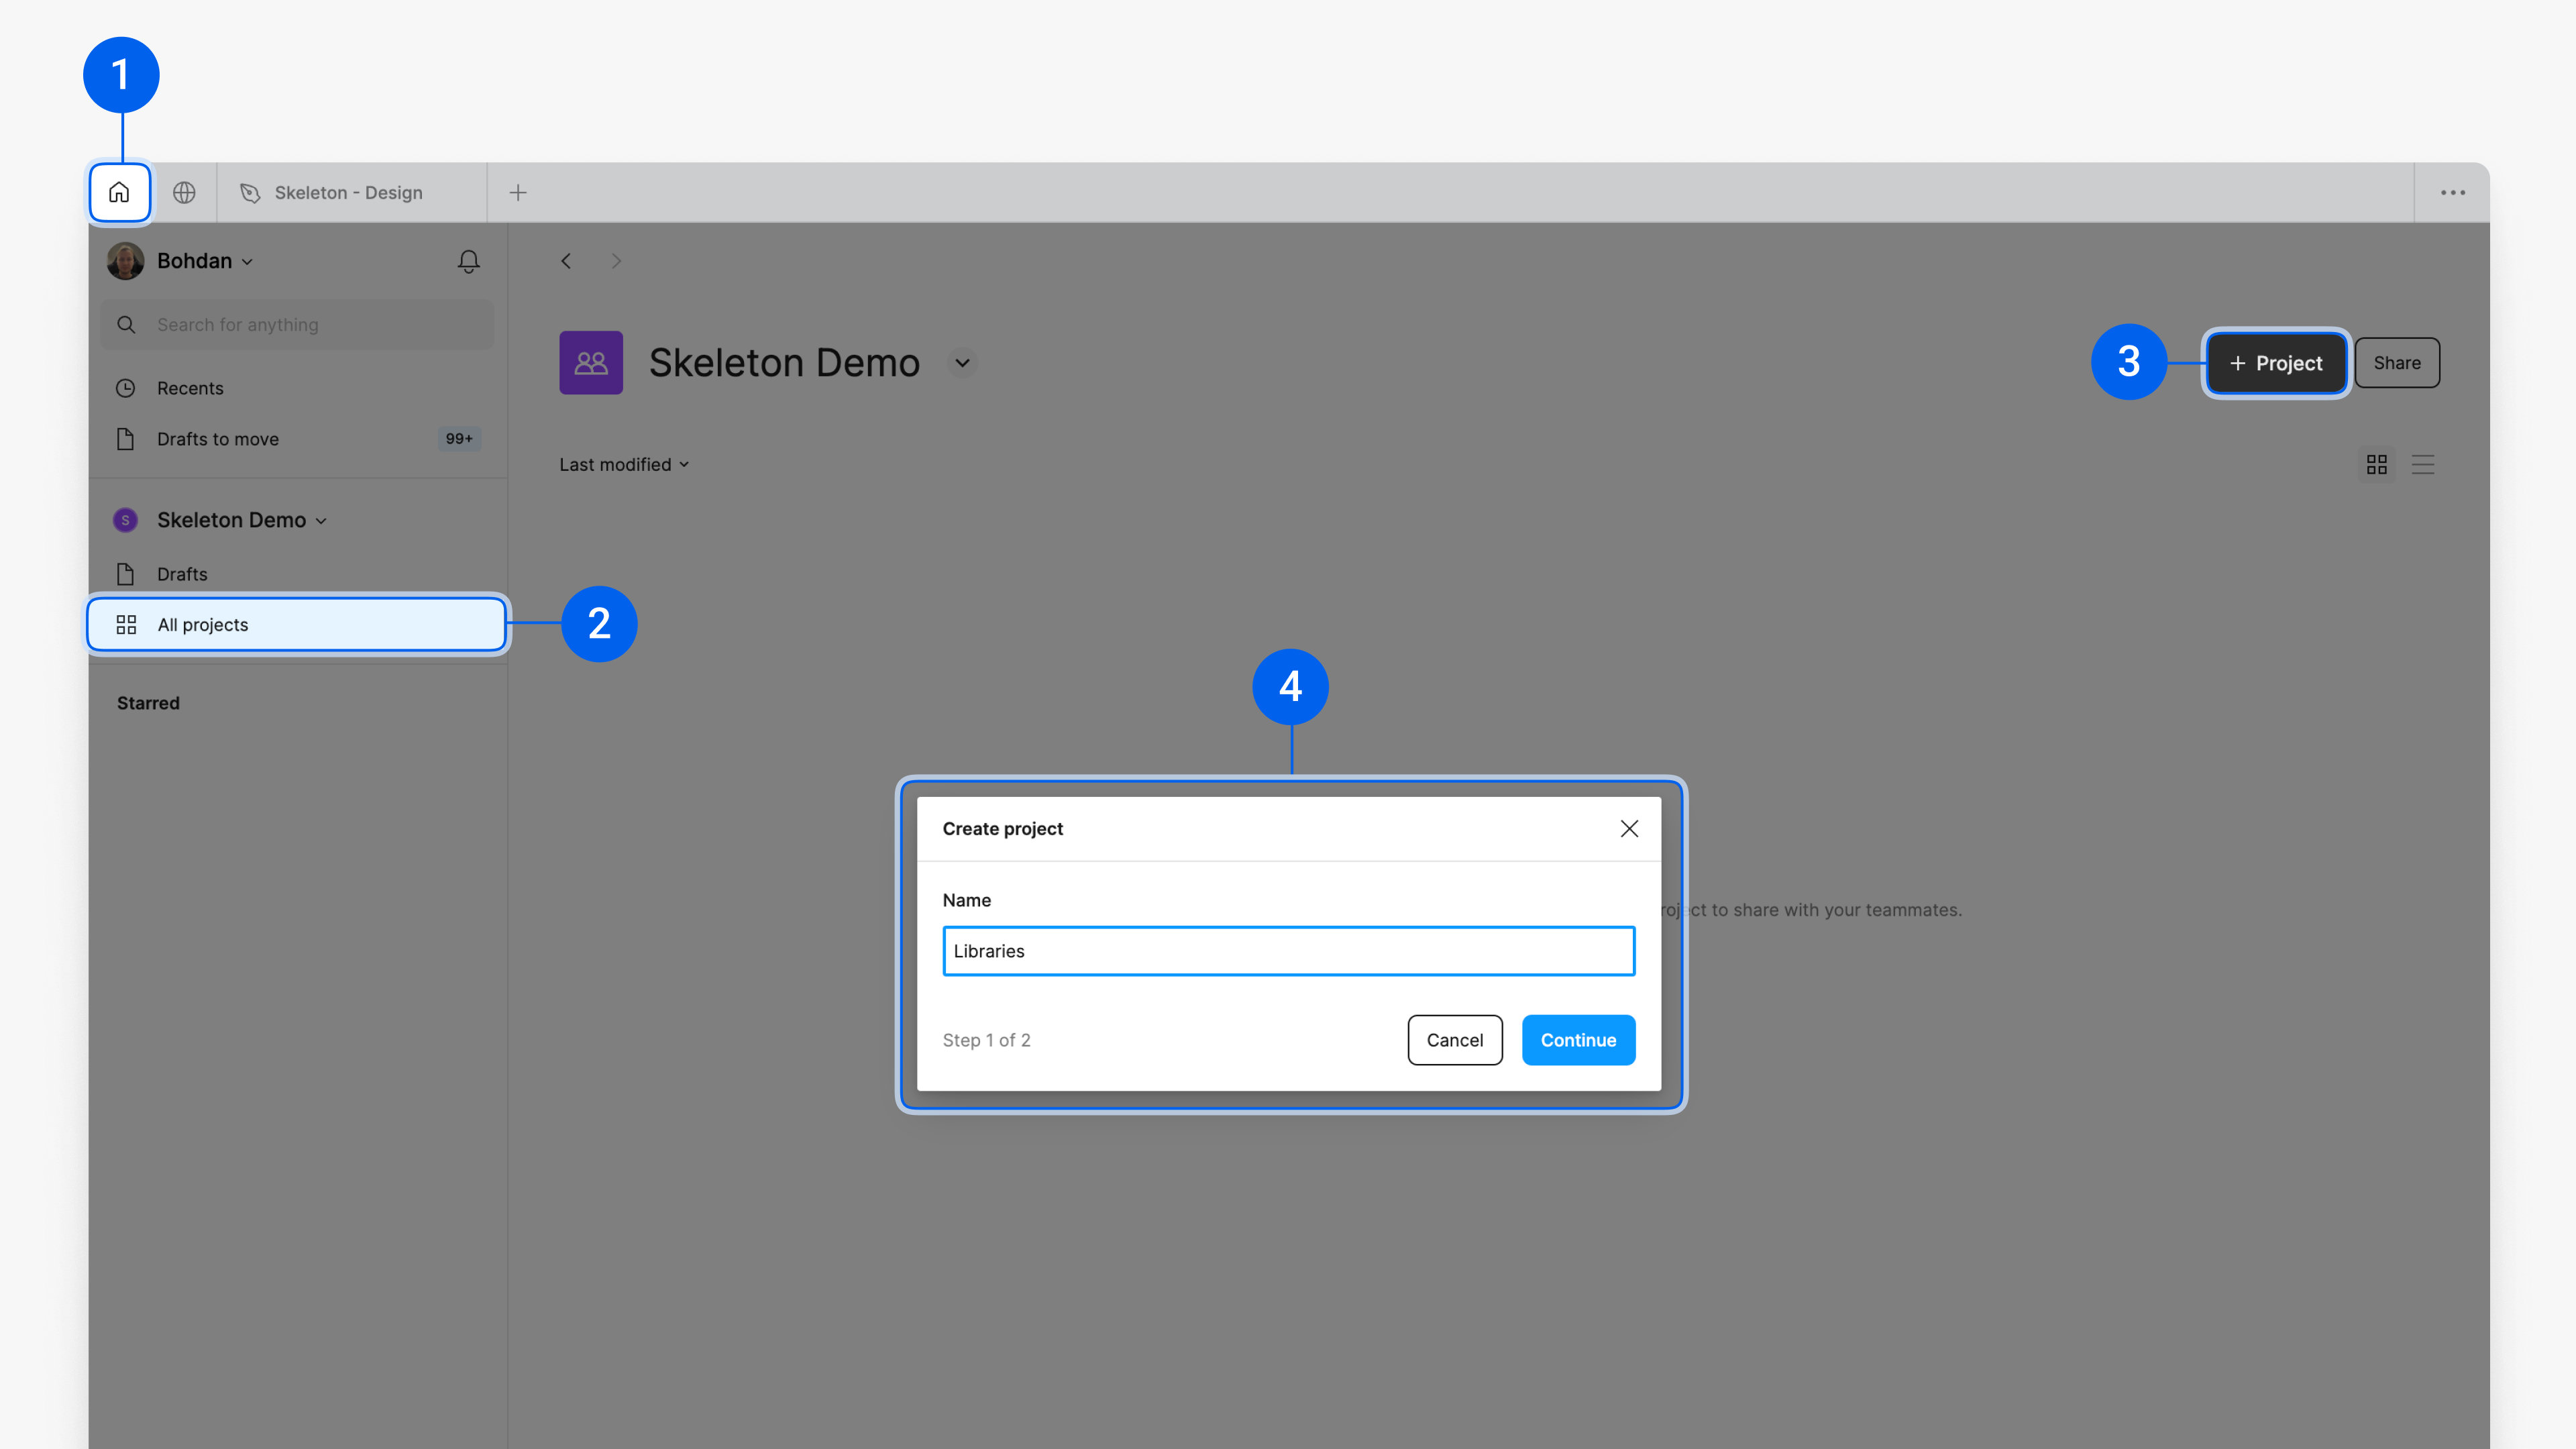
In Figma, go to Home¹ and select All projects² from the left sidebar². On the right side, click + Project³ and name the project Libraries⁴.
3. Import Skeleton Design System
From the project page, click Create new in the top-right corner⁵ and select Import⁶. Then, choose Import from computer⁷ and select the Skeleton Figma file.

4. Publish Skeleton Figma Library
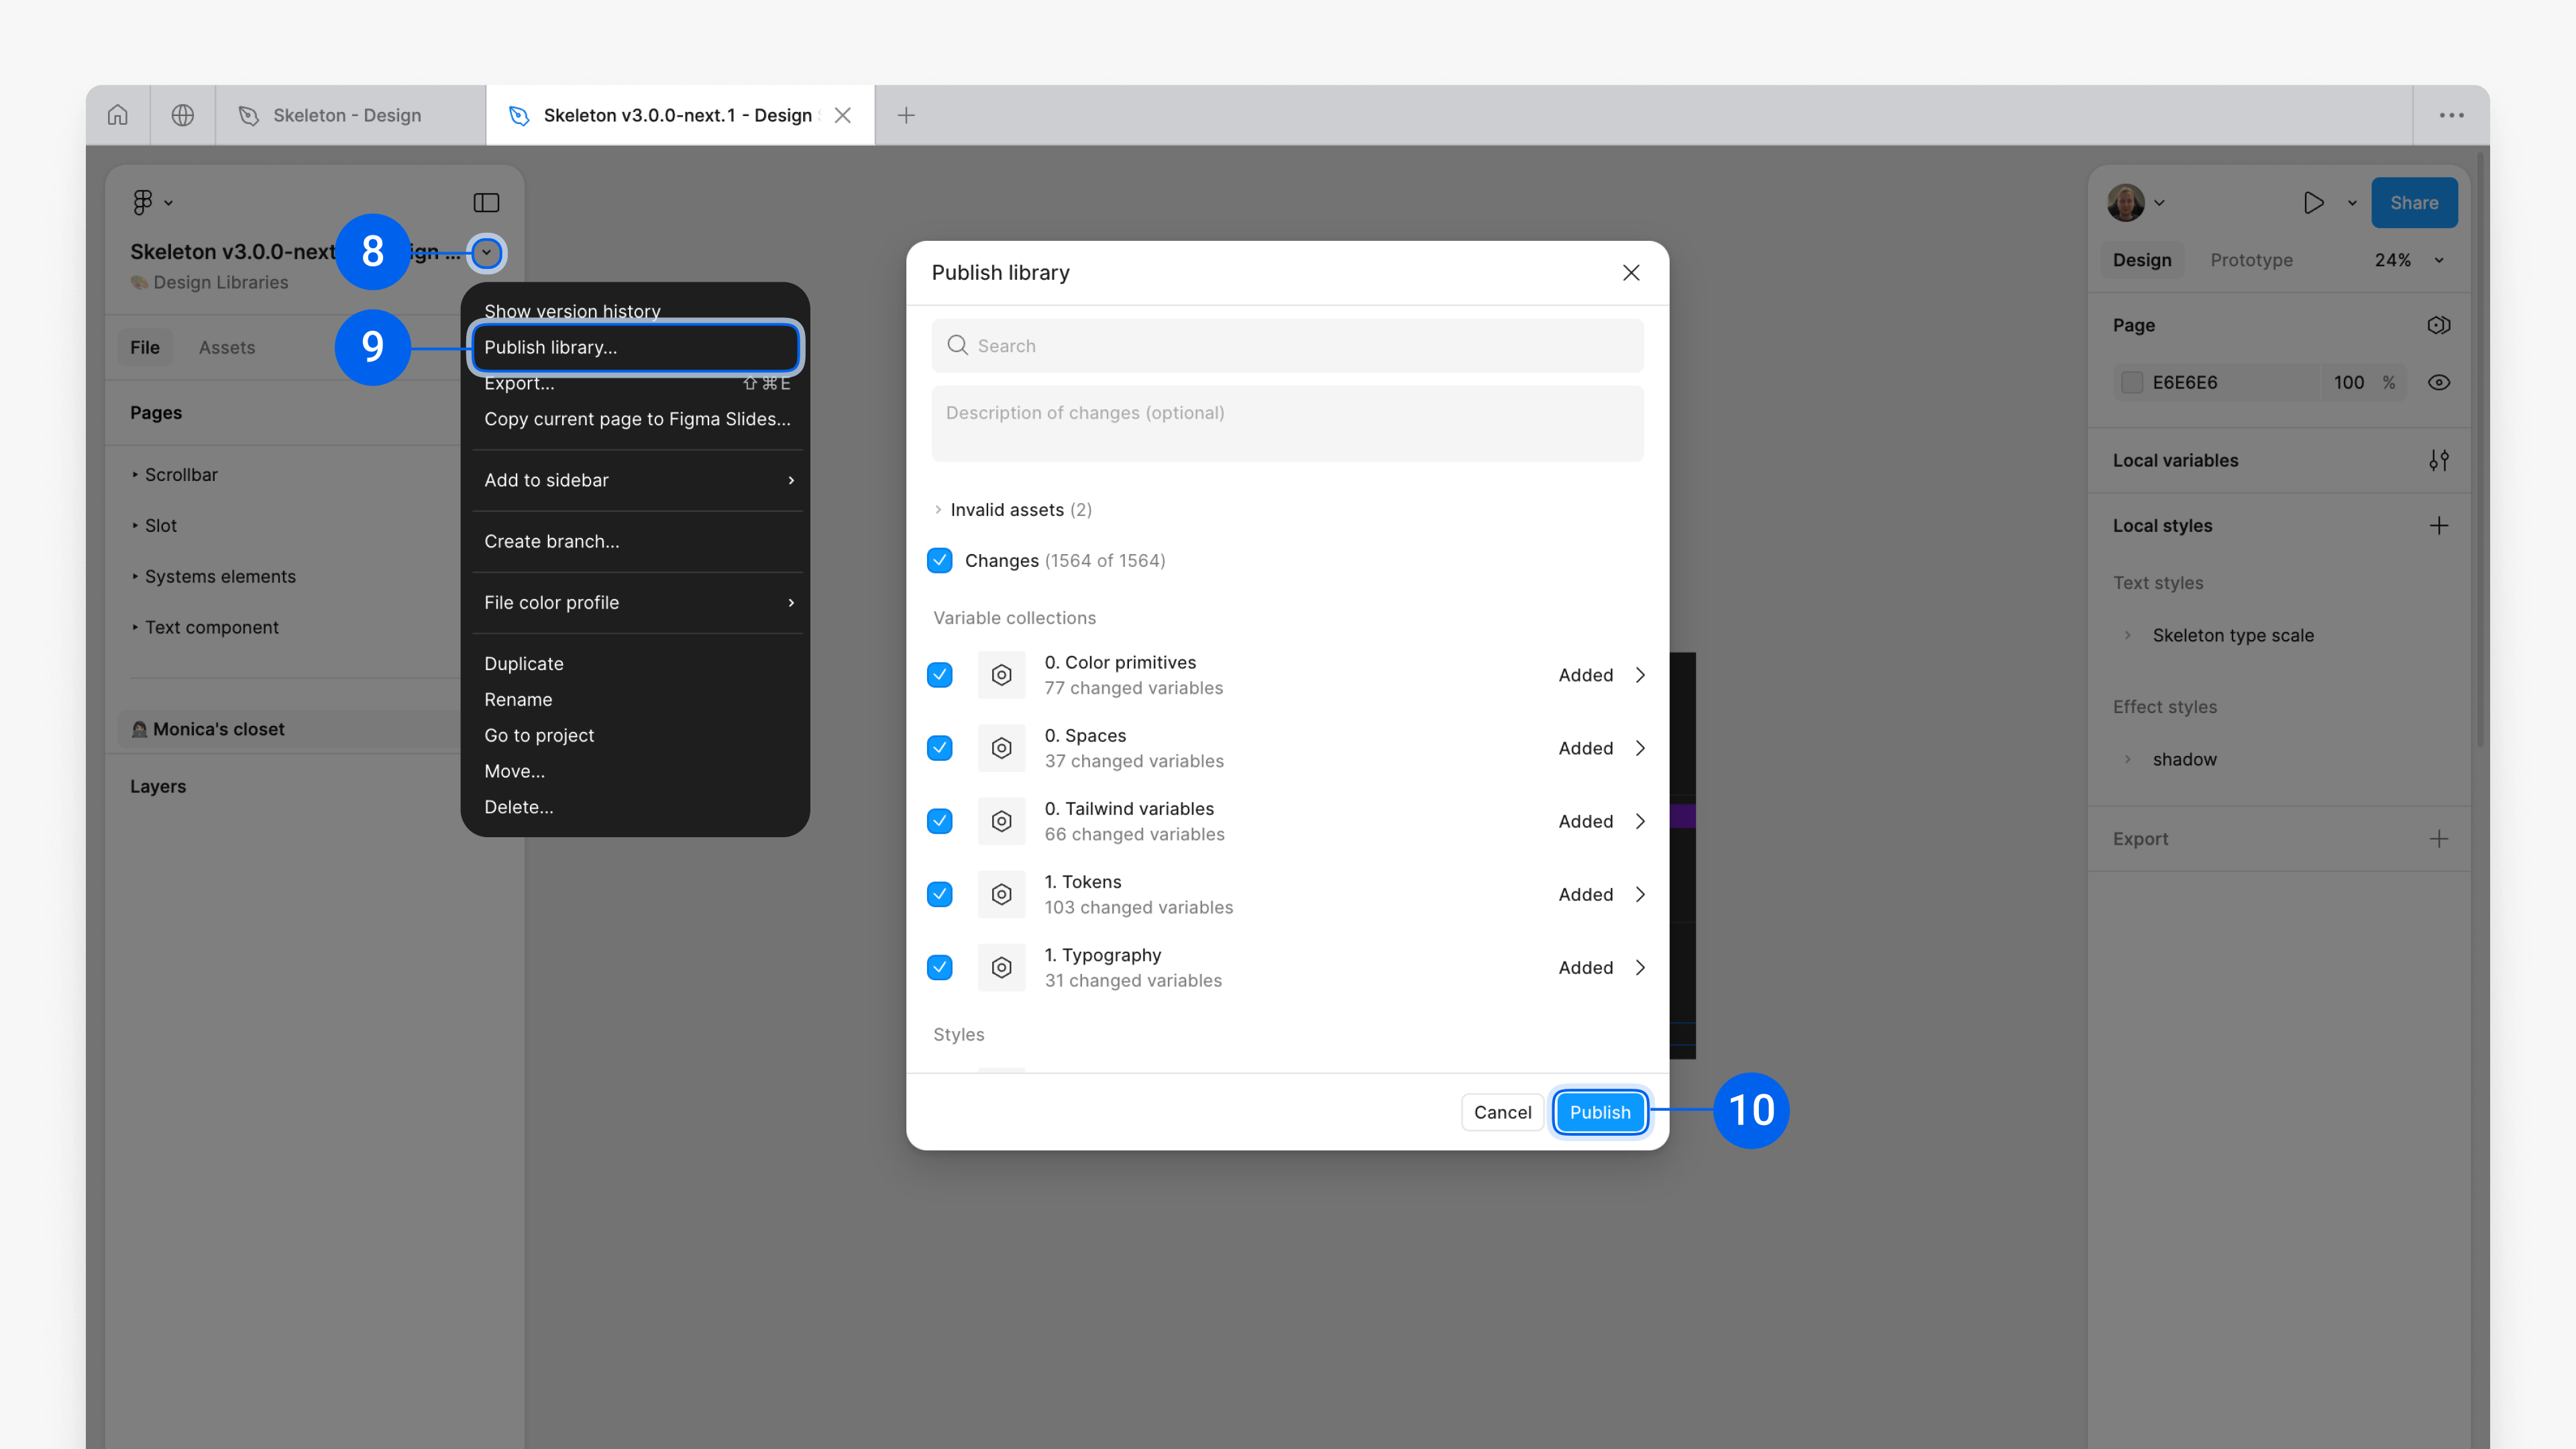
To use the library across all Figma files, it must be published.
Double-click the Skeleton Library to open it. At the top left, next to the library file name, click the chevron v⁸ and select Publish library…⁹. In the modal, click Publish¹⁰ and wait for the library to finish publishing.
Once published, you can access the Skeleton Figma Library in any of your projects.
How to Use the Figma Library
1. Open or Create a Project to Use the Library
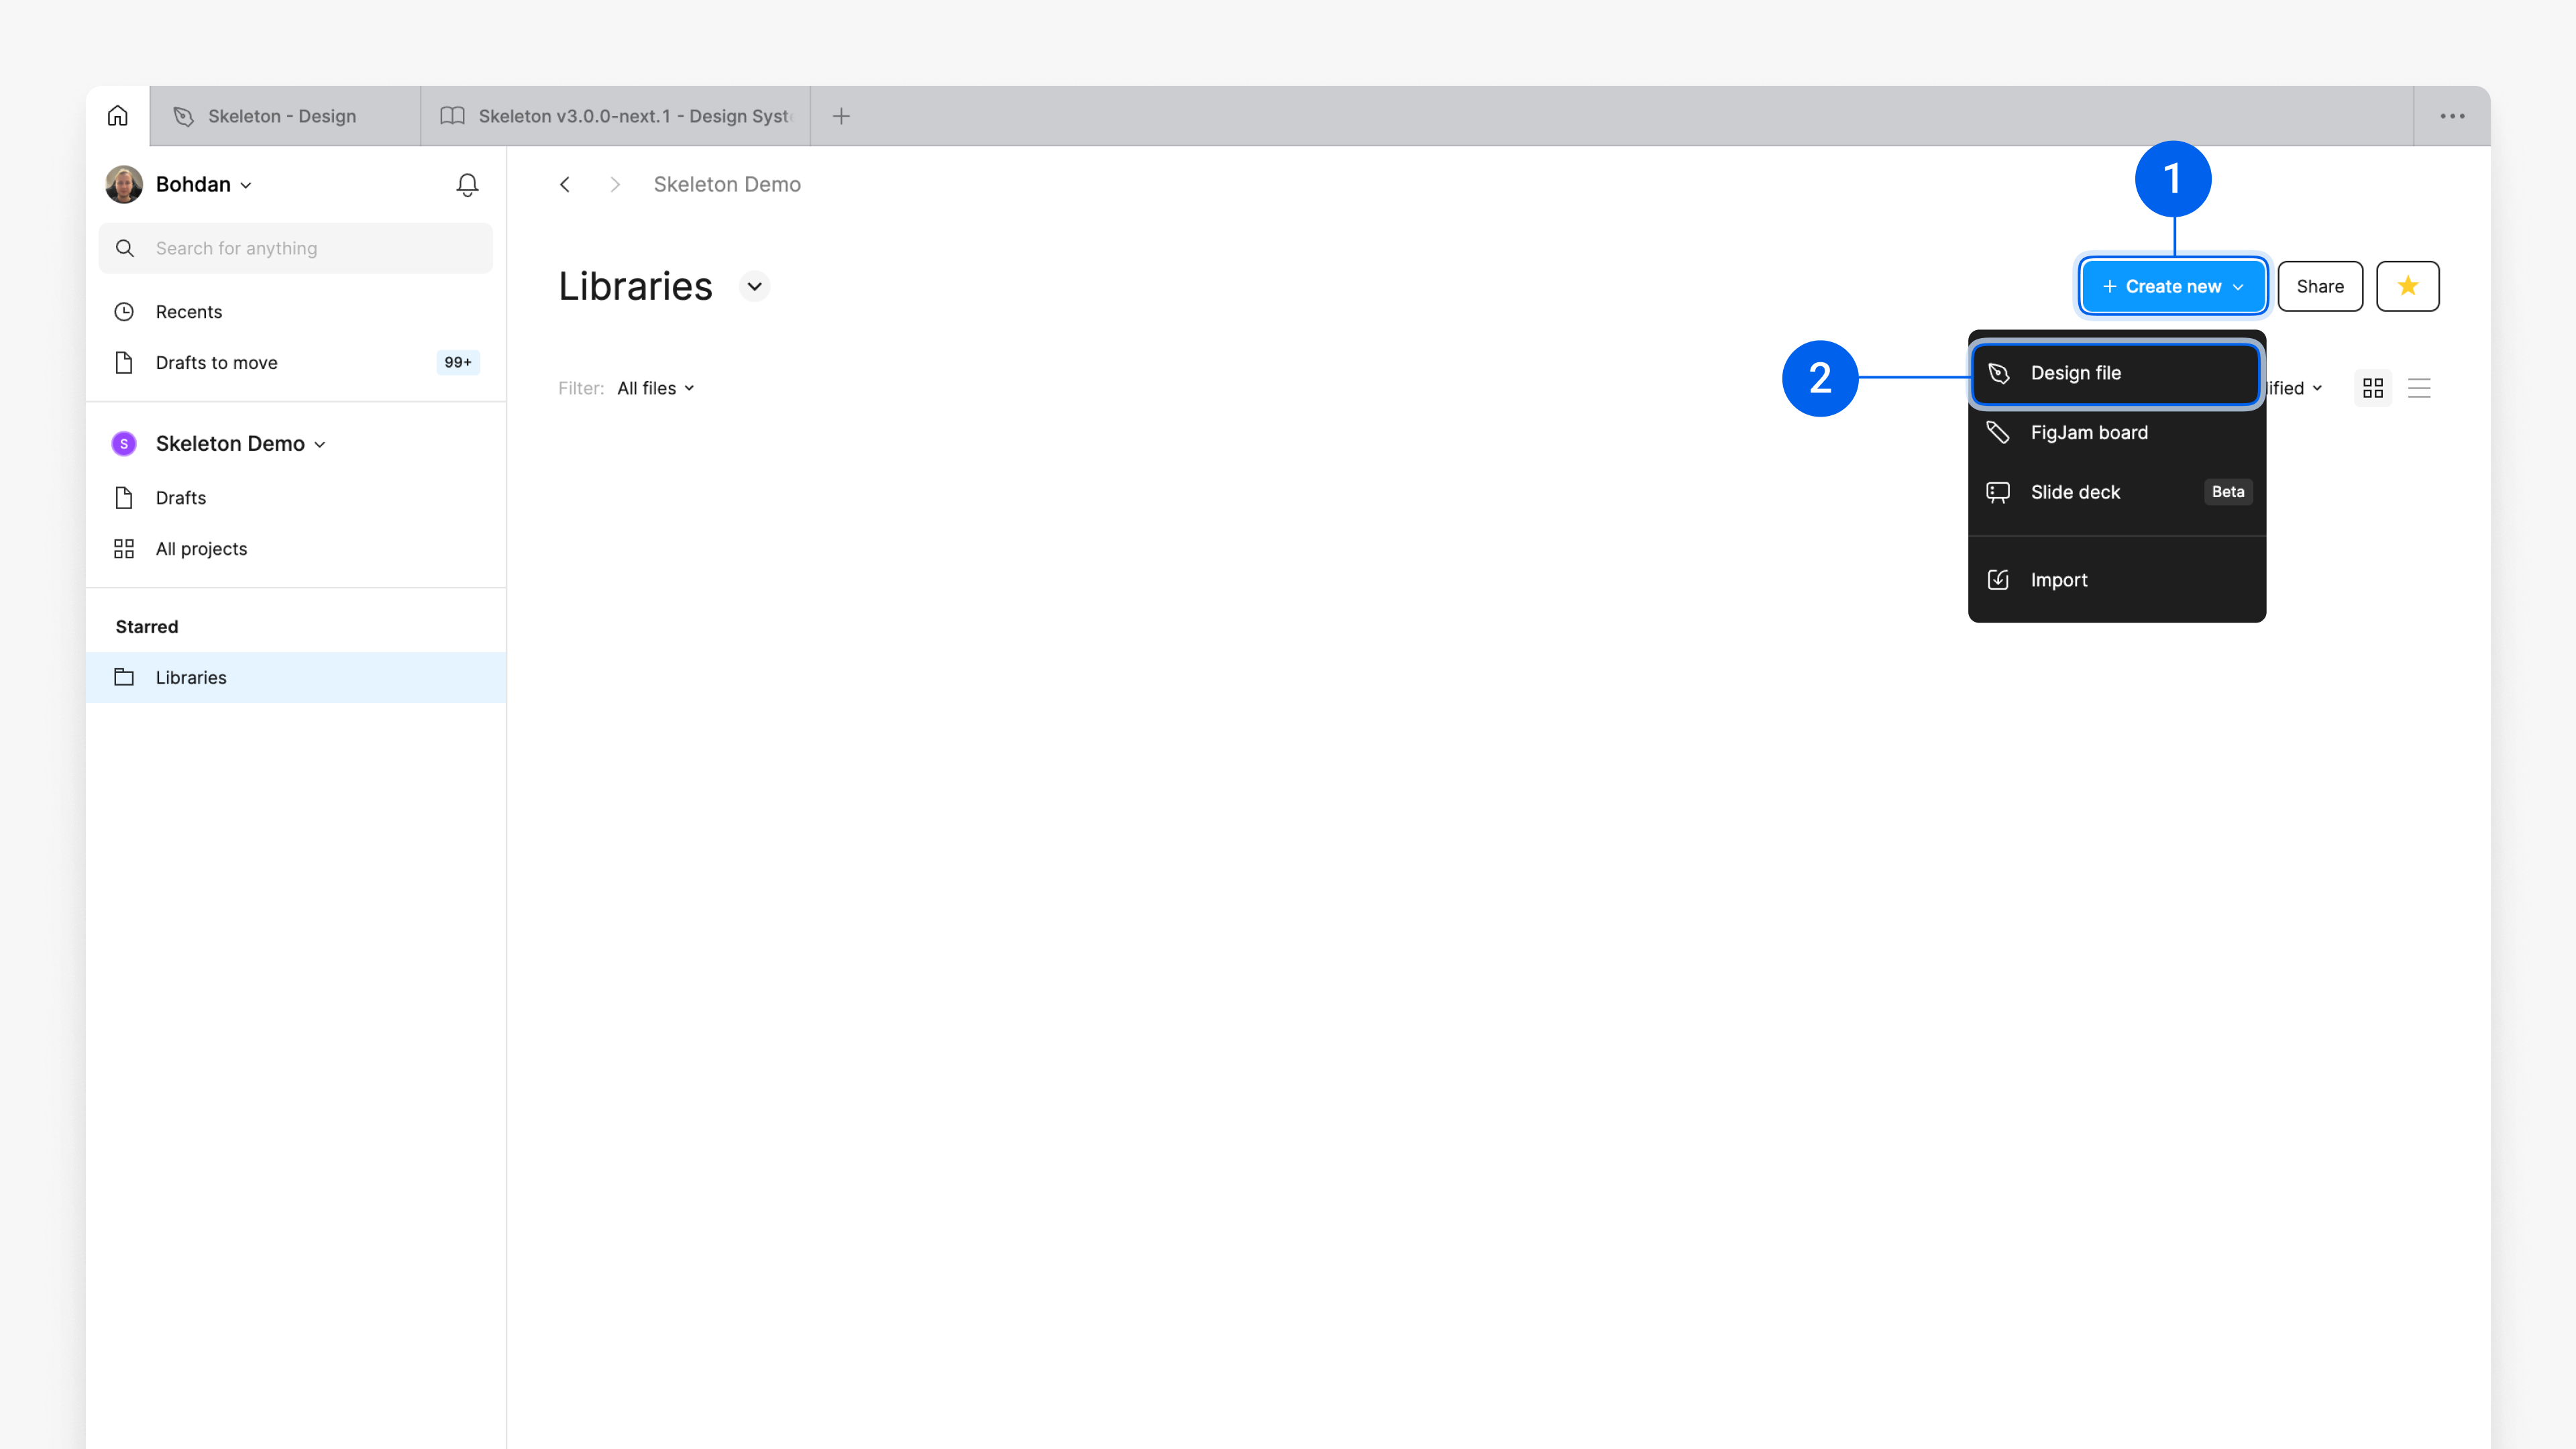
Open an existing project, or create a new one by clicking + Create new¹ and selecting Design file².
2. Add the Library to Your Project
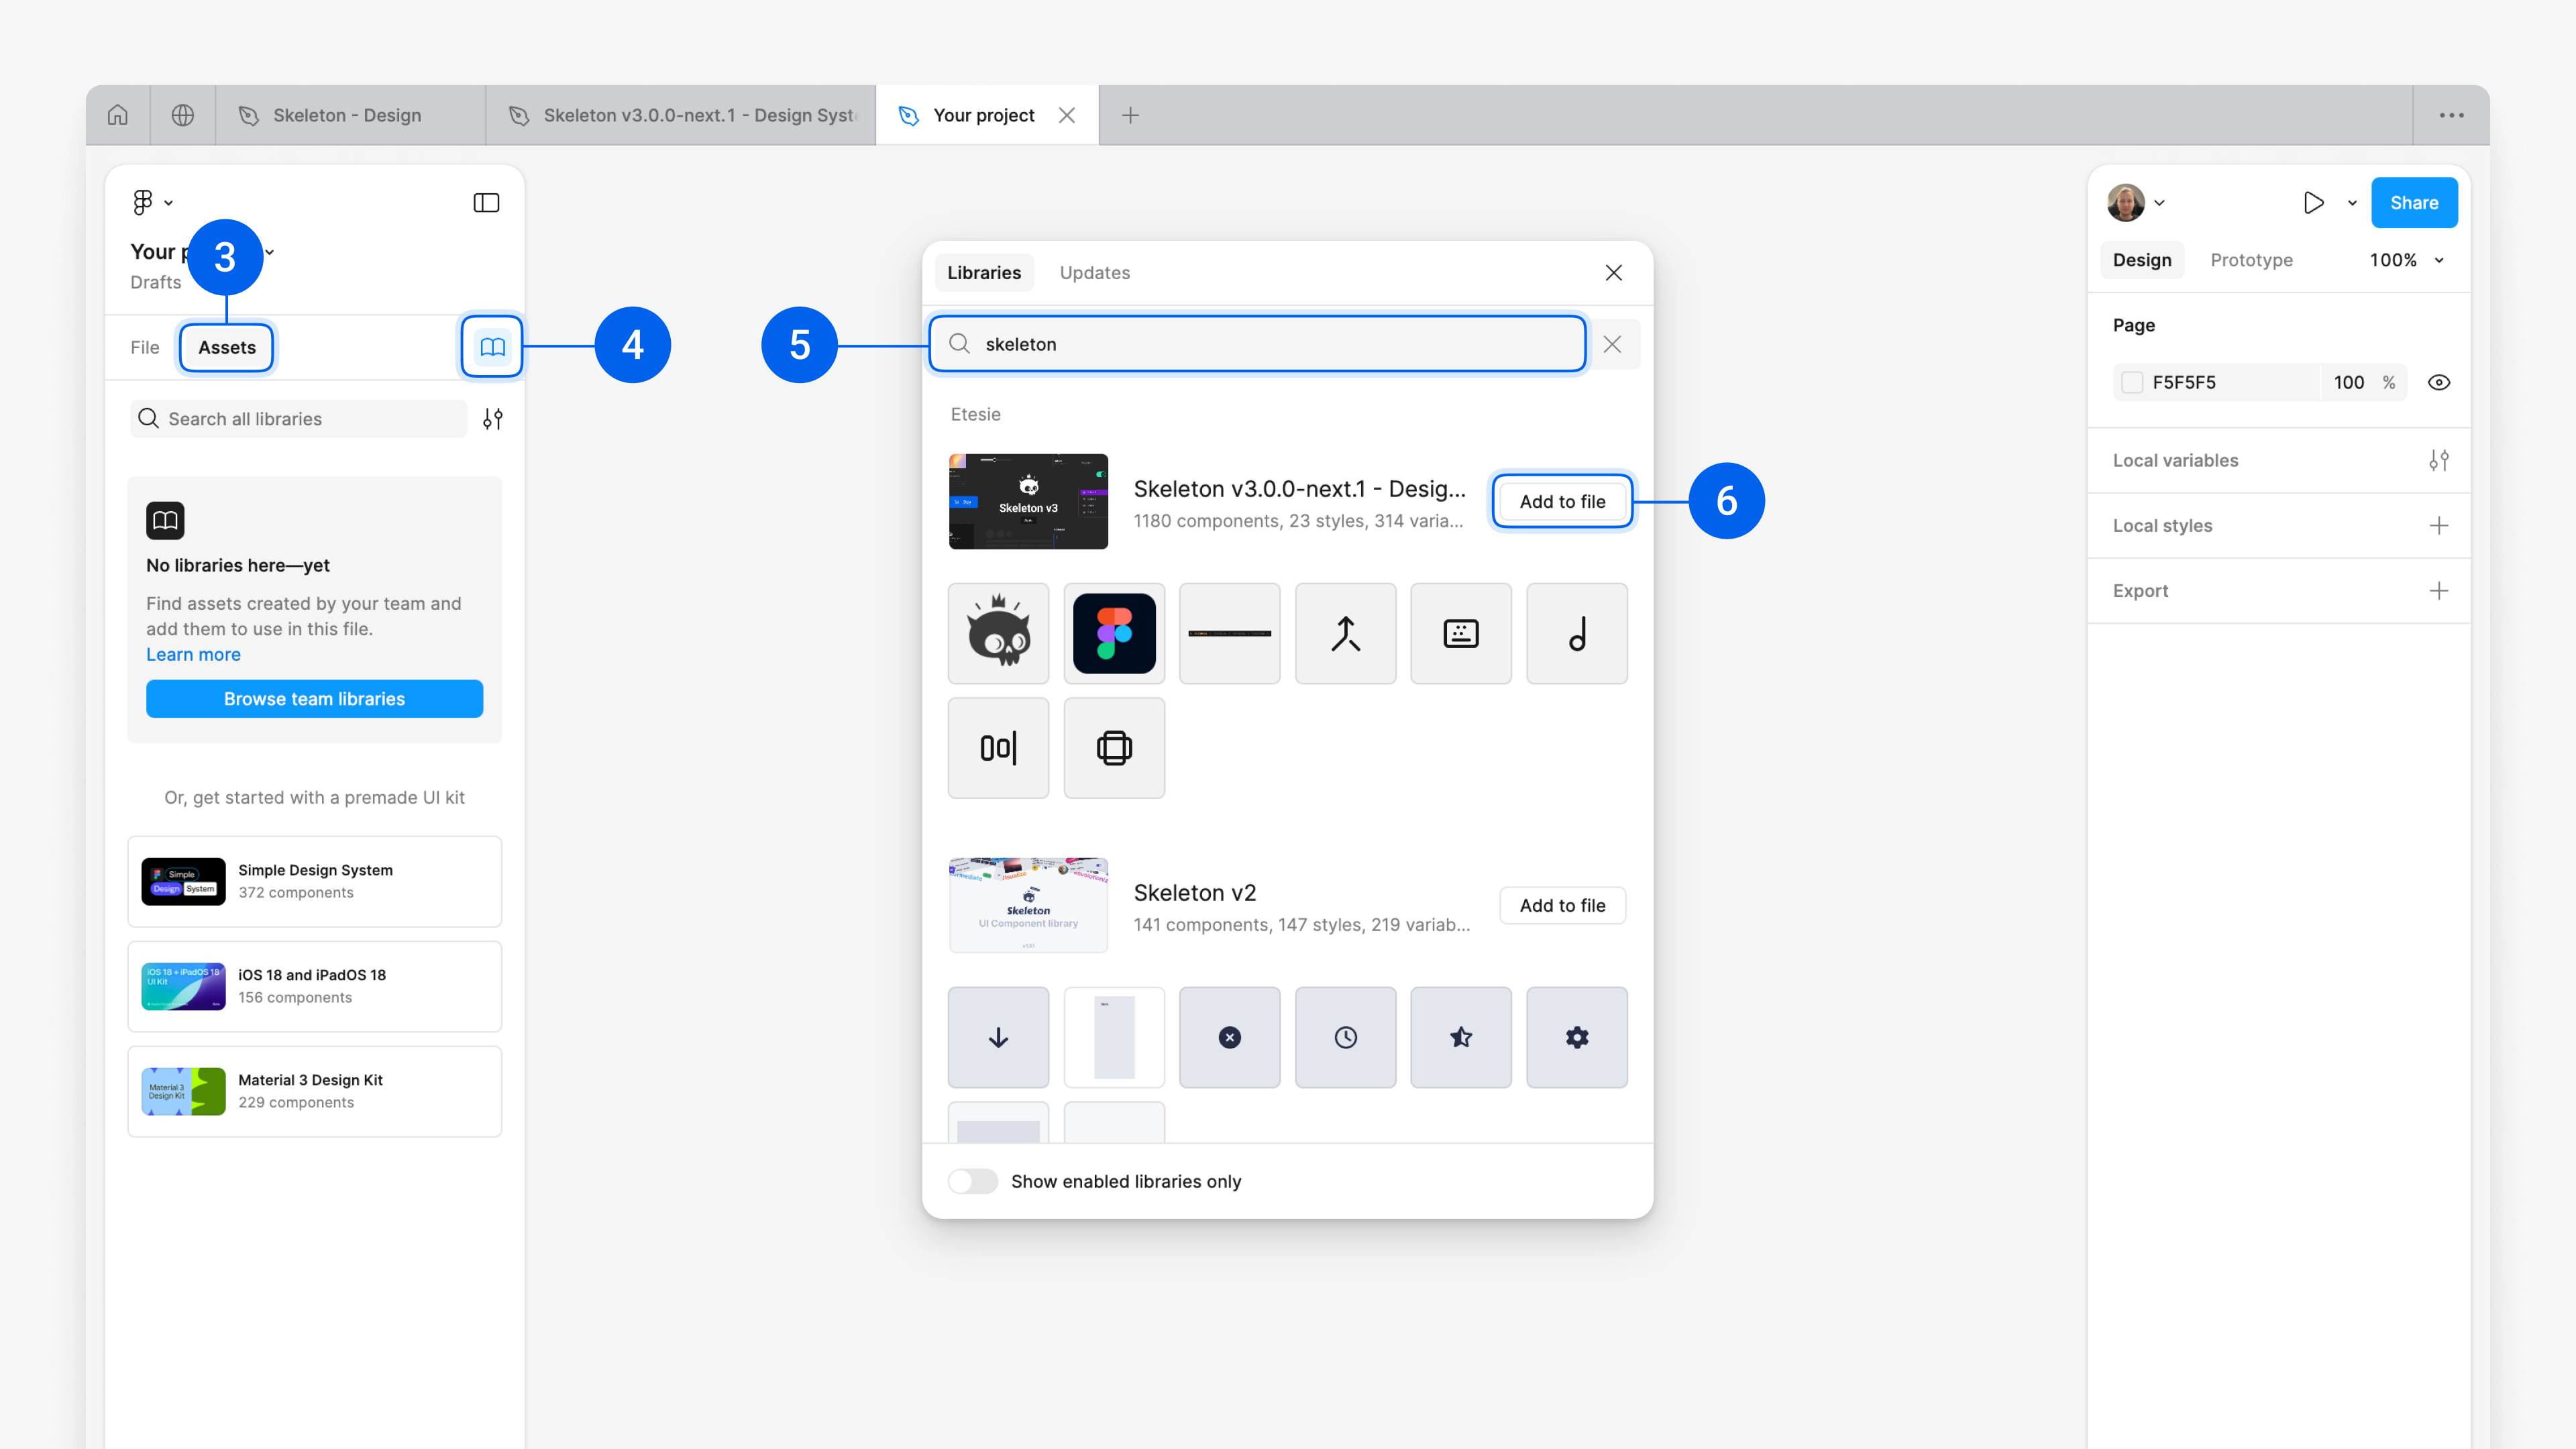
In the left sidebar, click Assets³, then click the ⁴ icon. A modal will appear with the Libraries tab active. Search for skeleton⁵ and click Add to file⁶.
The library is now added to your file, and its assets are ready for use.
3. Use Assets (Components)
You can now access the Skeleton Design library. In the Assets tab, you’ll see a list of Skeleton Components. Drag components onto the canvas or search for specific ones.
